3 File Menu
The File menu contains the basic commands for opening, saving and closing projects as well as various import and export commands.
3.1 New
This command closes any currently open project and creates a new project.
3.2 Open (Recent)
This command opens a project file, closing any currently open project.
3.3 Save (As)
This command saves the current project.
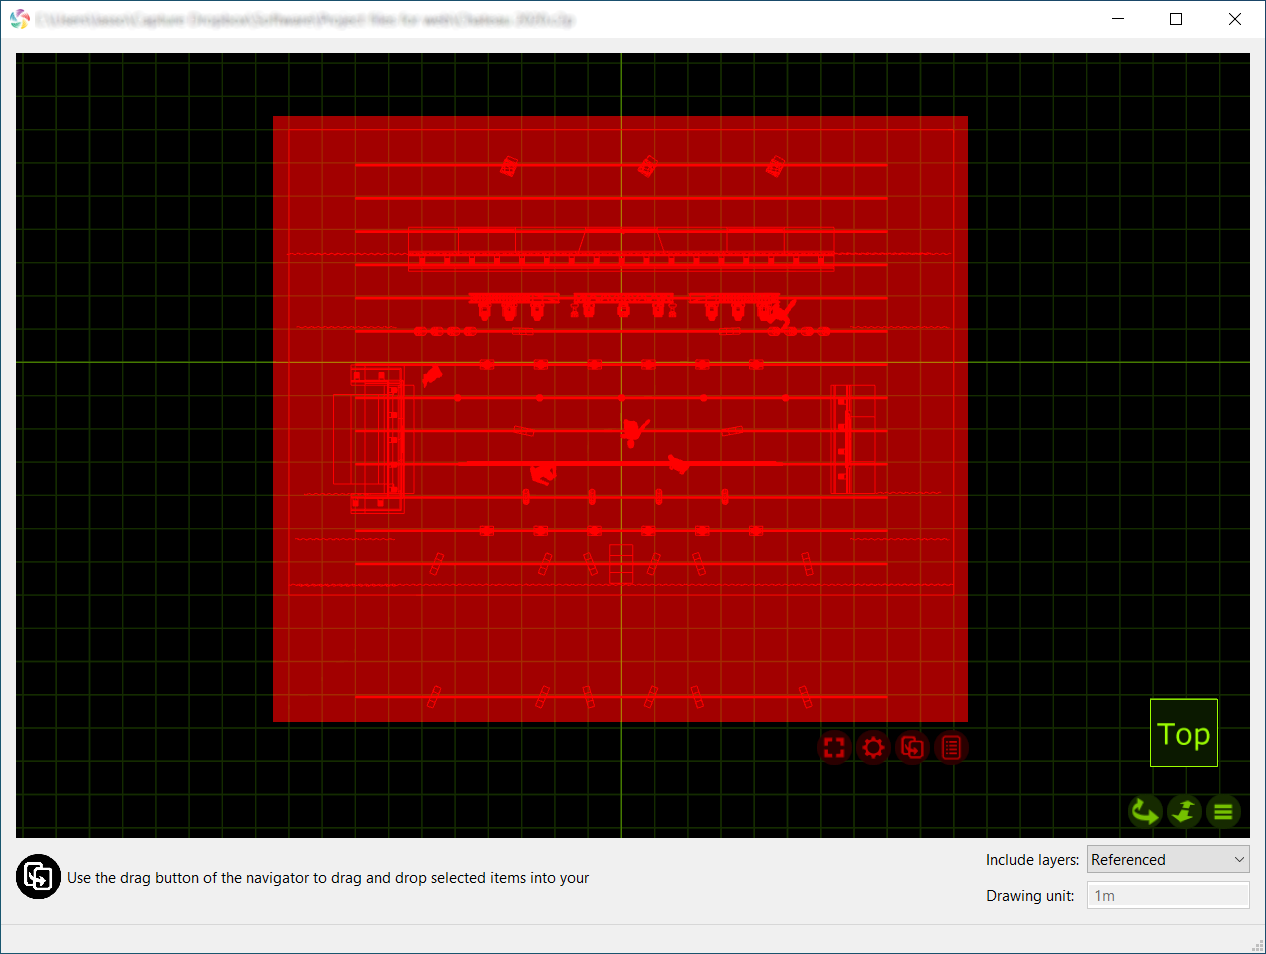
3.4 Import Model
This command is used to import models from other file formats as well as importing content from other project files. It opens these files in parallell and allows you to copy items into the project you are working with by using the arrow navigator button.
When opening older project files, a window may appear telling you that some fixtures have been updated since the project you are trying to import from. Its good practice to hit “Update” so the new project gets the same version of fixtures as in the current library.
When you drag object into your project you have the option of placing them where you put the mouse pointer or at their original position. Once you have finished, simply close the file you were importing from.
When importing models from other file formats attempts to preserve Drawing block name and Drawing name information. This information can later be useful when replacing imported objects with library fixtures, either manually or using the Import Data feature.
3.4.1 3D Studio (.3ds)
This file format was the native format for the early versions of 3D Studio, a very popular 3D modeling software later acquired by Autodesk. It is rich in material settings and information required to produce very realistic models. Capture successfully handles most of the information in a 3DS file, however some of the more advanced material properties are not supported. 3DS textures are not embedded inside the 3DS file but loosely packaged, typically in a folder alongside the 3DS file itself. Be careful to take this into account when sending and receiving 3DS files! There is a rich amount of 3DS files available on the internet. However, many of these have been converted from other formats using automatic conversion tools of questionable quality.
3.4.2 Autodesk Drawings (.dxf, .dwg)
The DXF format is a relatively simple text based format useful to transfer smaller models and drawings of simple nature. The more complex DWG format can contain more complex information such as solids and materials.
Both the DXF and DWG formats stand out in the fact that they do not enforce a model object hierarchy – a drawing could consist of loosely scattered polygons and lines only. As this is a problem for Capture, all drawing content that does not belong to a “block” will be grouped by layer, material and solids to single objects in Capture. In order for textures to import, the texture image file must located at either the same path as on the computer on which the DXF or DWG was saved, or in the same folder as the DXF or DWG file being imported.
Block defininition names are used as the Drawing block name, however the name of block definitions that only reference other blocks is also used as the Drawing name.
3.4.3 glTF (.gltf, .glb)
The GL Transmission Format is a royalty-free and open format that supports physical-based materials.
Node hierarchies are imported by creation of groups.
3.4.4 Maxon Cinema 4D (.c4d)
This is the native format of Maxon’s Cinema 4D 3D package.
In order for Capture to be able to import model data from a C4D files it must either have been saved with the Cinema 4D preferences setting Files / Save Polygons for Melange set or using the Save Project for Melange.. function.
All objects in the scene graph are imported, but the tree as such is not preserved in any way. Only flat and UVW texture projections are supported.
Object names are used as the Drawing name and the name of the object referenced by an instance object is used as the Drawing block name.
3.4.4.1 Cinema 4D Hantmade Stage Plugin Support
When importing Cinema 4D files, Capture recognized Hantmade Stage fixtures and imports them as single objects. If a Capture fixture identity has been set a fixture’s Capture export settings, the fixture is automatically replaced with a fixture from Capture’s library.
3.4.5 My Virtual Rig (.mvr)
Created by the GDTF group, the MVR format is an interchange file format containing 3D geometry, textures and patch information.
Capture supports MVR version 1.4 and imports all data. On import the user is prompted to identify fixture types from the Capture library that correspond to the fixture types referenced in the MVR file.
3.4.6 Portable Document Format (.pdf)
Vector based contents of PDF files can be imported as a 2D model. Raster based content, such as images, do not import. Only the contents of the first page of a PDF is imported. The imported model is scaled according to the page size.
3.4.7 Sketchup (.skp)
This is the native format of Trimble’s Sketchup make and Sketchup Pro software packages.
While Sketchup supports double-sided materials Capture does not and will favor the front material over the back material. Capture will also preserve block and group transformations (useful for replace fixture operations) as long as no lines or surfaces in the group have been subject to mirroring.
Group and component names are used as the Drawing name and component definition names are used as the Drawing block name.
3.4.8 WaveFront (.obj)
The OBJ file format was developed by Wavefront Technologies for its Advanced Visualizer animation package in the 1980s. It is a simple and text based, yet very competent file format.
As with the 3DS format, OBJ files do not have material textures embedded. Instead they are loosely packaged alongside the OBJ file, typically in a separate folder.
Group names are used as the Drawing name.
3.4.9 VectorWorks
While Capture does not support VectorWorks (.vwx) model files, it is possible to import a design from VectorWorks including both the model and fixture information. This workflow does require that you have access to VectorWorks.
First export a DWG file from VectorWorks which will contain the stage model as well as the model of the fixtures. Then also export an “Instrument Data” file using the “All” setting which will contain all information about the fixtures in the DWG file such as their fixture type(s) and patch.
In Capture, first use the Model Import command to import the DWG file. At this point you will see VectorWork’s 3D models of the fixtures and be able to select them, but not operate them as Capture does not yet understand that they are fixtures.
Finally use the Data Import command to import the “Instrument Data” file previously exported. Once you have identified the fixture types of the file you will see the previously inanimate fixture models exchange for regular Capture fixtures, fully functional and with relevant information such as patch and notes transferred from VectorWorks.
3.5 Import Fixture Data
This command allows you to import a CSV (and TSV) text files containing fixture instance/patch information which can be used either to add new fixtures to or update existing fixtures in your project.
CSV files are text files with information structured in a spreadsheet-like manner using (typically) commas as column dividers and linebreaks as row dividers. Because they are text files they can be opened and modified in text editors such as TextEdit or Notepad, but they are more typically produced an consumed by spreadsheet applications such as Numbers or Excel.
Capture attempts to configure itself automatically based on the headers Capture uses itself when using the Export Fixture Data command, but also based on headers produced by other popular softwares. However, because ultimately any columns may be present in a CSV file it may be necessary to manually map some columns from the CSV file to Capture fixture properties. This is done in the File column mapping section.
In order for Capture to know whether to update an existing fixture or add a new fixture it is also necessary to select a property by which to uniquely identify fixtures. This is done with the Identify fixture by dropdown choice.
When Capture finds fixtures in the data file that do not exist in your project it can add new fixtures based on the information in the file. How to determine the type of fixture to add is decided by the column selected for the Fixture property of the New fixtures subsection.
Optionally, Capture can also replace imported objects in your project file with new fixtures. This behaviour is enabled by selecting a column for the Drawing name property of the New fixtures subsection. Capture then uses the Drawing name property of imported objects with the selected column of the data file to find matches. It is possible to choose whether the match needs to be exact or only partial using the Drawing name matching property.
3.6 Import Project Content
This command allows you to import layers, filters, reports, plot styles and plots from other projects.
3.7 Export Model
This command exports the model of the project for use in other 3D software. To export plots, use the Plots category of the Design tab or the Plot Editor instead.
3.7.1 Autodesk Drawings (.dxf, .dwg)
Models exported to DXF or DWG files includes all geometry, layers and materials (but not including textures). Distance and angle measurements are exported as dimensions. Blocks are used for repeating geometry such as fixturs and trusses as well as object groups.
Several attributes such as Unit, Note, Annotation, Channel, Patch, and Circuit are also exported, depending on the type of objects.
3.7.2 glTF (.gltf, .glb)
Models exported to glTF files include all geometry and materials (including textures). The scene graph includes object groups.
Exported files also contain the CAPTURE_model glTF extension with fixture data information, including the full patch, filters and gobos. For more information on the CAPTURE_model extension, see the Developers page on our website.
3.7.3 My Virtual Rig (.mvr)
Models exported to MVR include geometry (without materials) and fixtures / patch information with placeholder geometry.
3.8 Export Fixture Data
This command can be used to export information about fixtures in a variety of formats.
Exported CSV, TSV and Lightwright files can be opened in any text editor such as TextEdit or Notepad as well as spreadsheet softwares such as Numbers or Excel. Exported XML format files can also be inspected in text editors even though they are not intended to be used that way.
To export, go to the “File” menu, select “Export Fixture Data..” and specify the desired location, type and name of the exported file.
3.8.1 Exporting to grandMA 2
When exporting to grandMA 2, a number of layer schemes are available:
- Project layers creates one MA layer for each Capture project layer with exported fixtures.
- Fixture types creates an MA layer for each type of fixture exported.
- Single creates one MA layer which contains all fixtures exported.
On export a dialog is also shown where it is possible to specify the manufacturer, product name and fixture numbers of each fixture type exported. If left as is, the fixture types can be assigned in grandMA 2 after import, but if you wish to to avoid this step (and have already imported all required fixture types in your grandMA 2 show), then use these fields to set up the matching information.
3.8.2 Exporting to Hog 4
On export to Hog 4 it is important for the exported file to contain the exact same manufacturer and product names as in the Hog 4 fixture library as otherwise fixture will be skipped on import.
On export an additional dialog is shown where you can adjust the manufacturer and product names exported for each fixture. Crosscheck these with the names of the fixtures available in your fixture library or use it to change fixture types on export, for instance in order to swap fixtures for desk channels.
3.8.3 Importing exported fixture data in grandMA 2 onPC
First copy the exported MA 2 XML file to C:\ProgramData\MA Lighting Technologies\grandma\gma2_V_x.x.x\fixture_layers. Then, on the command line, enter the following commands, assuming the name of the exported file was exported_file.xml:
- cd EditSetup
- cd Layers
- import exported_file.xml at 1
- cd /
3.9 Export Focus Sheets
This command creates a set of images, one per fixture (or as configured in the configuration dialog presented), giving you a view out through the aperture of the fixture. It requires you to pick a folder into which the images are placed.
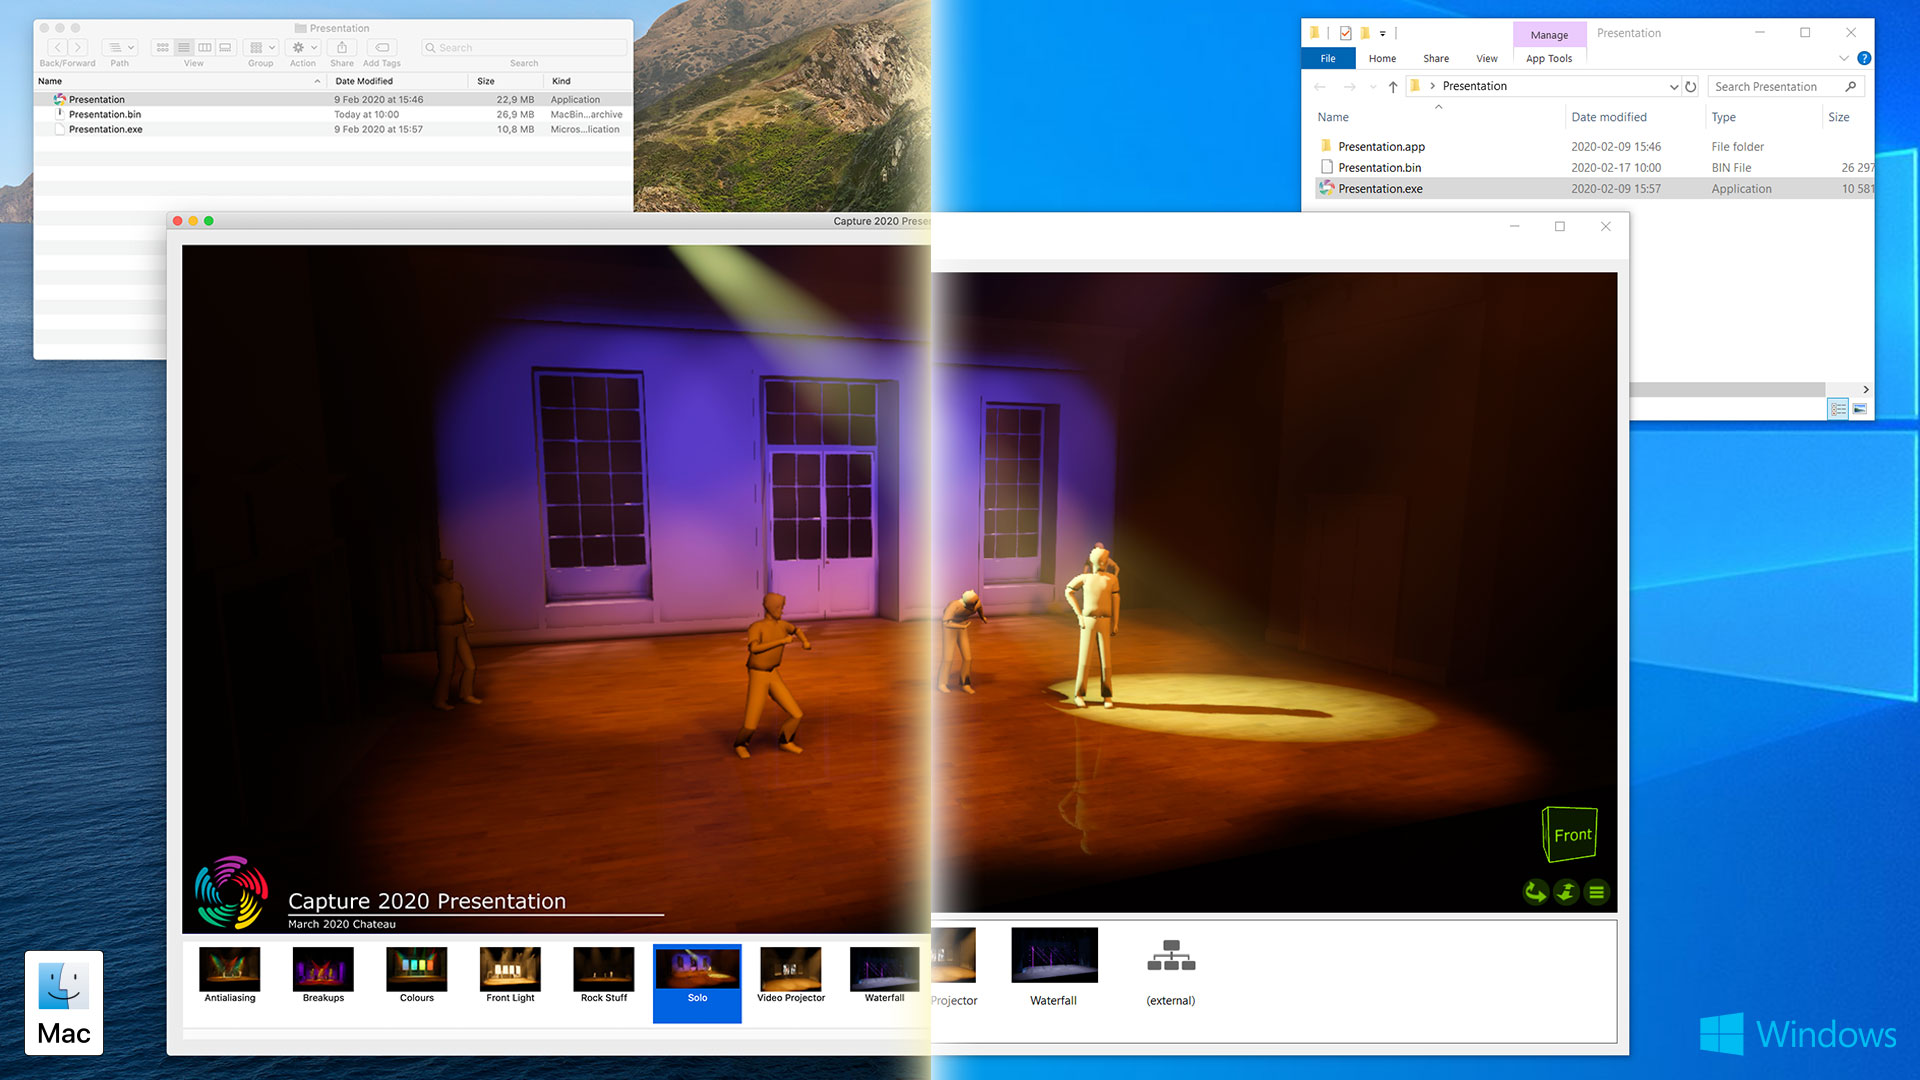
3.10 Export Presentation
This command exports the Alpha view of your project as a presentation.
A presentation is a ZIP archive file containing three things:
- A presentation viewer executable for Windows (.exe file)
- A presentation viewer app for macOS (.app folder)
- A non-modifiable version of your project (.bin file)
It can be used on the same computer or any other computer running Windows or macOS that satisfies the requirements of Capture. To use a presentation ZIP file, extract it and run the correct viewer for the operating system - it will be easy to identify thanks to its icon. Once launched it will automatically open the accompanying project (.bin) file and present the Alpha view.
If the project contains snapshots, these will be presented in a pane at the bottom of the presentation window. Click on any snapshot to play it back. At the end of the list of snapshots is an option named (external) which deactivates snapshot playback and accepts DMX input. The snapshot pane can be hidden using an option in the Window menu.
It is possible to access both rendering settings and the universes tool pane from the Window menu.
Note that because of the nature of macOS apps, extracting the ZIP archive may permanently damage the presentation viewer for macOS. Therefore online file sharing services with ZIP file “intelligence” could cause damage to presentation files.
3.11 Export For
These commands allow you to export your project to older versions of Capture.