3 Object Manipulation
Any physical thing in a Capture project file is an object, whether it be a Lighting Fixture, piece of stage deck, LED screen, table or chair - is irrelevant. They are all treated the same in respect to adding them to the project, moving them around, cloning (copying) them, deleting them and accessing their properties.
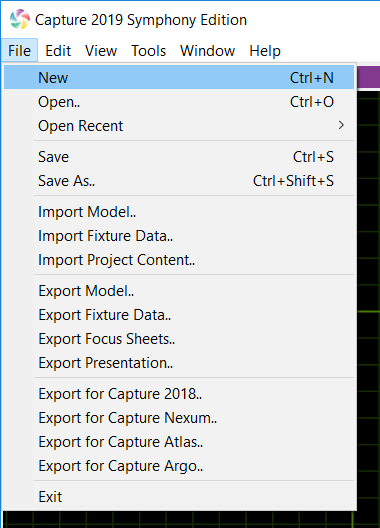
To explore more about object manipulation, start a new Capture Project. Do this by going to the main menu in the top left corner and pressing New.
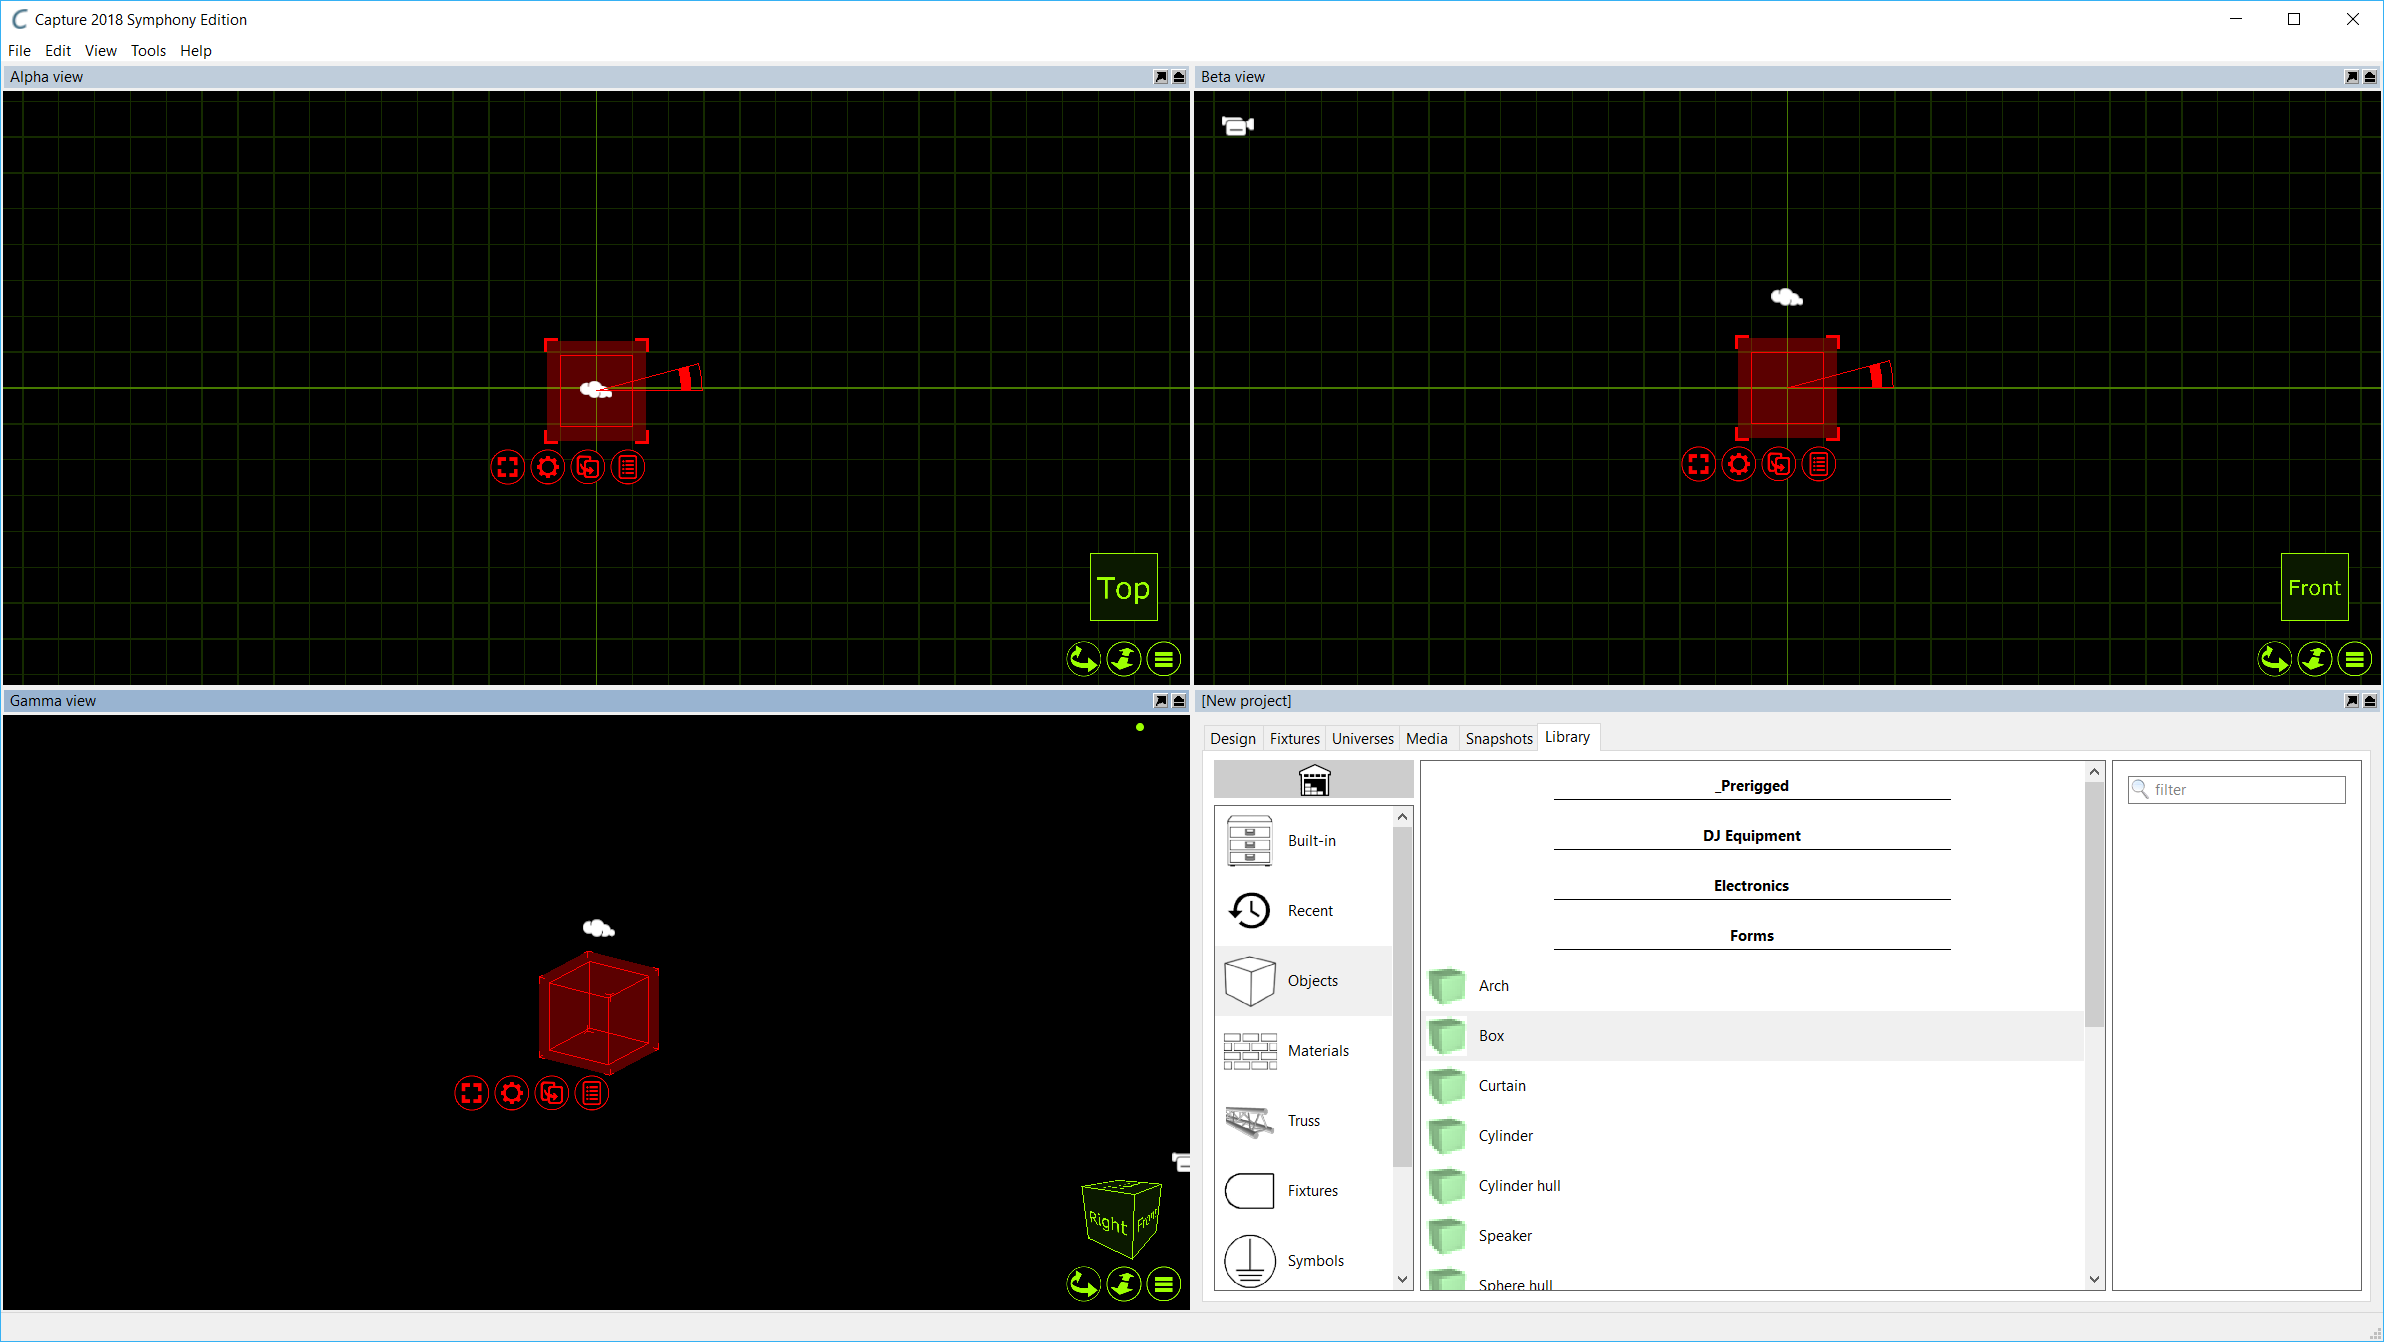
Leave the Alpha and Beta views with their default settings. Change the Gamma view to the Live mode by clicking on the green list button and selecting Live. Your windows should look the same as the image below.
3.1 Adding Objects
Now we have a clean project file, we can proceed to add some objects to it.
To add an object to the project, we must first locate it from the Library. The Library tab in the Project Window is where all objects can be located. We want to add a stage floor.
Navigate to the Library, click on Objects, then again on Forms. Click on the Box form and drag it into either the Alpha or Beta view. Your project should look something like the image below.
We can now proceed to changing the properties of the box so that it looks more like a stage floor. You may select the box by simply clicking on it in any of the views. The red navigator will appear around the box. Press the red spanner button to present the options available for the box.
Click the Properties option. This will toggle the project window to the Design tab with the Selected Items section already active showing the properties for the box.
Change the box dimensions to a width of 12m, height of 0.1m and a depth of 8m. Your Properties should look like the image below.
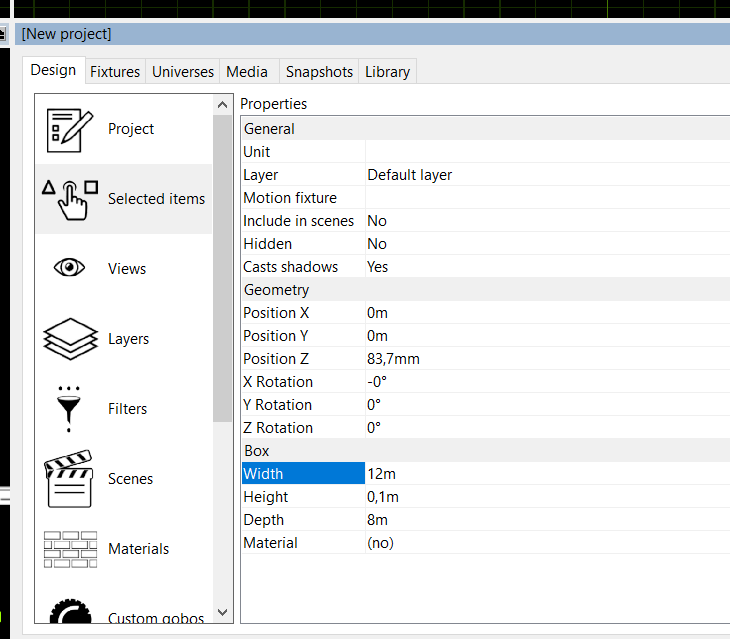
The end result will be the box looking a lot more like a floor.
Now we have a stage floor in place we can proceed to add some more objects. We will add some truss in above the stage. Adding a piece of truss is done in the same way the box was added. Locate the desired piece in the library and drag it into either the Alpha are Beta view. For the sake of example, we will use a piece of truss from the Generic folder. Double click the Truss folder, double click again on the Generic folder, and again on Box. Choose the Generic Rectangular Section and drag it into one of the views.
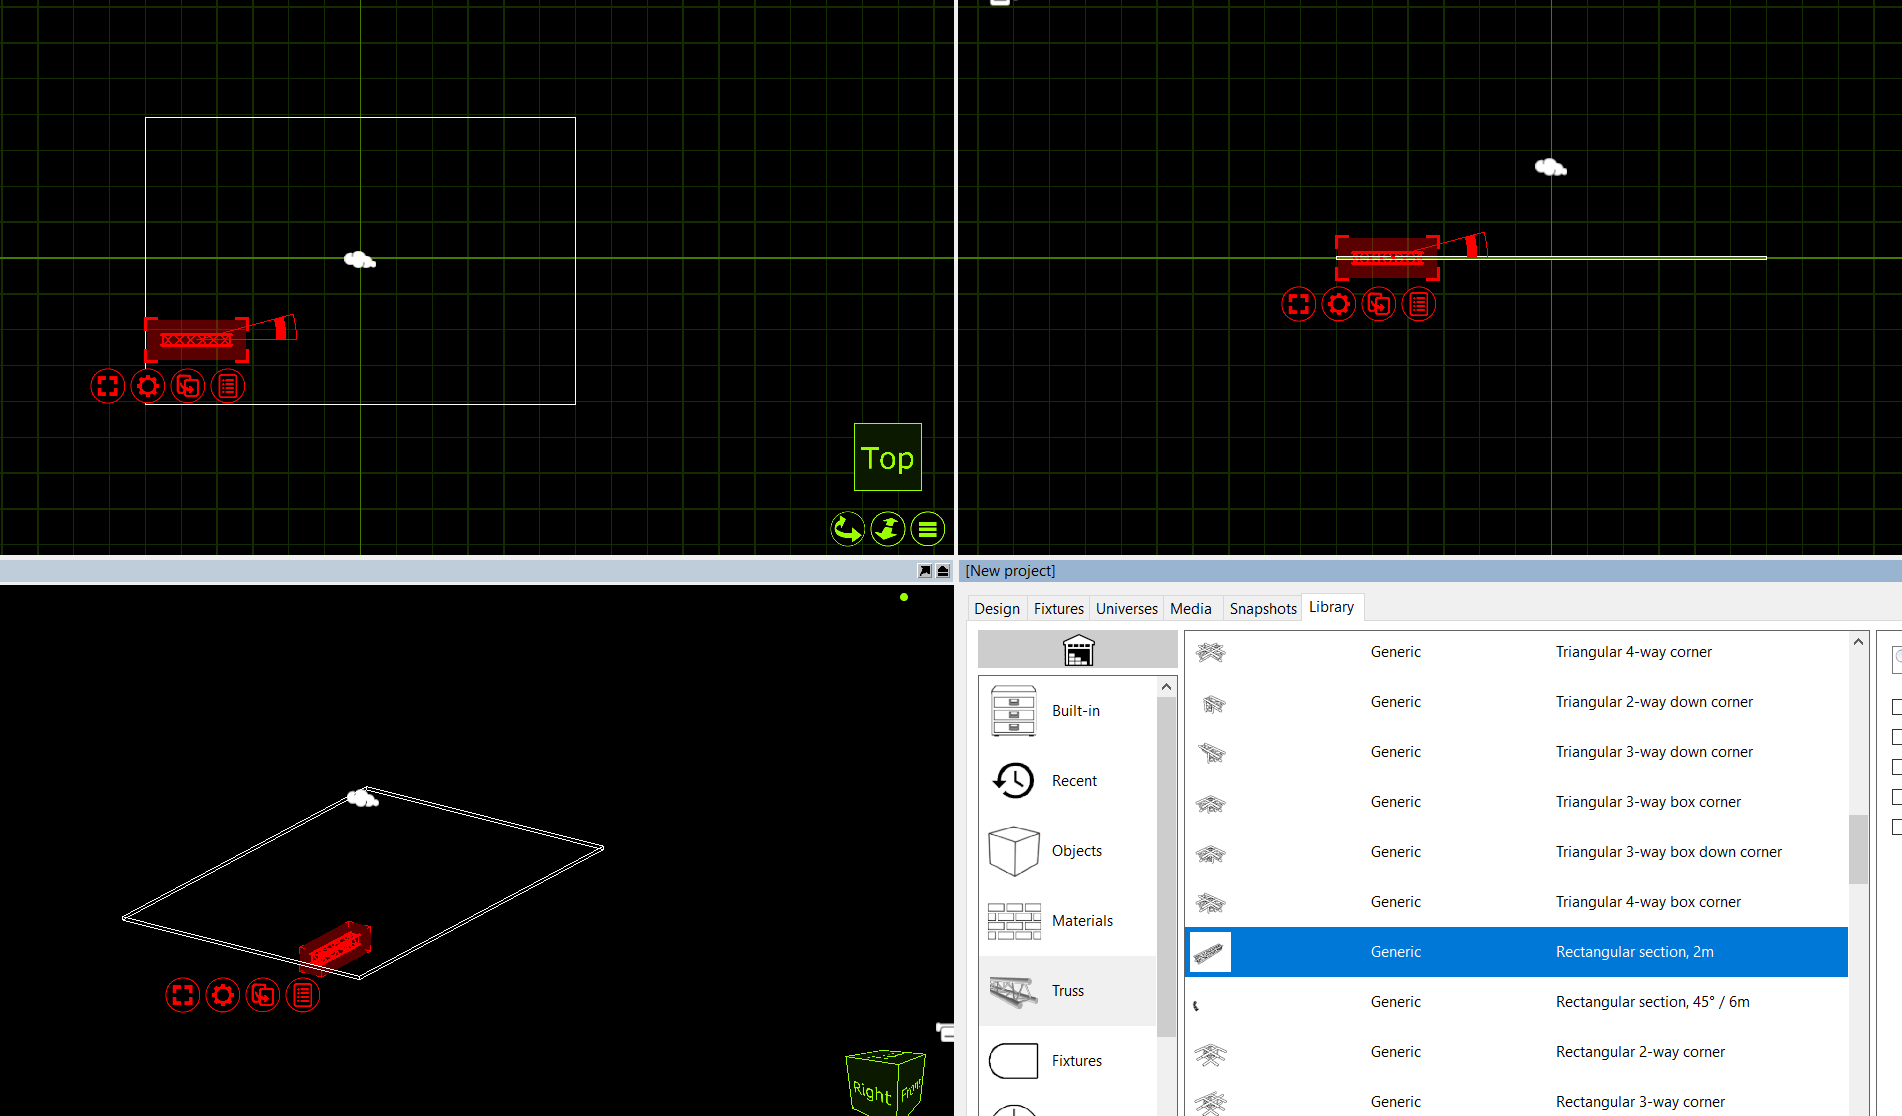
The Truss is 2m wide. We know that the stage floor is 12m wide. We now want to add more 2m sections of truss to result in one long truss going from one side of the stage to the other. This can easily be done with the Clone feature.
Click on the truss piece to select it. Press the red spanner button to access the available options for the truss.
Click the Clone option, this will bring up the Clone window. Set the X Offset to 2m and set the number of clones to 5. This will then add sections of 2m truss right across our 12m wide stage evenly.
Currently, they still act as 6 separate pieces of truss. Select the pieces and press the red spanner button again. Choose the Group option and now the 6 sections are grouped together. They can now be moved and manipulated all as one.
3.2 Navigator commands
The navigator’s actions menu contains a number of commands that can be used to manipulate the currently selected objects.
3.2.1 Transform
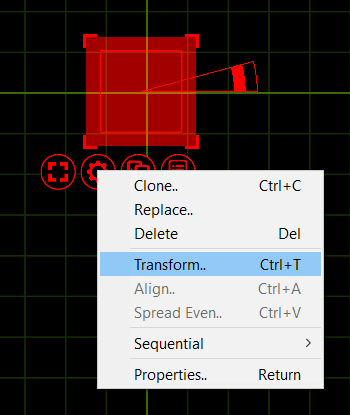
This command allows you to move or rotate by an exact distance or amount of degrees. Use the green navigator cube to guide you with the X, Y and Z directions in the current view. Note that the rotation angle takes the placement of the rotation anchor into account and always performs a Group rotation.
3.2.2 Align
The Align option allows you to select a group of objects and quickly align them a long a specific axis very quickly. Whatever align function is used is always relevant to the design view you are using it in. The options available are displayed to the right.
3.2.3 Spread Even
The Spread Even function allows you to select a group of objects or fixtures and spread them evenly along a vertical or horizontal axis very quickly. It is extremely useful for making lines of objects very quickly.
3.2.4 Clone
This command allows you to create one or more copies of the object or group of objects you have selected. Use the green navigator cube to guide you with the X, Y and Z directions in the current view. The offset values are applied incrementally which means that if you specify two copies with an offset of 2m, the first copy will be created 2m away from the original and the second copy will be created 4m away from the original etc. Note that the rotation angle takes the placement of the rotation anchor into account.
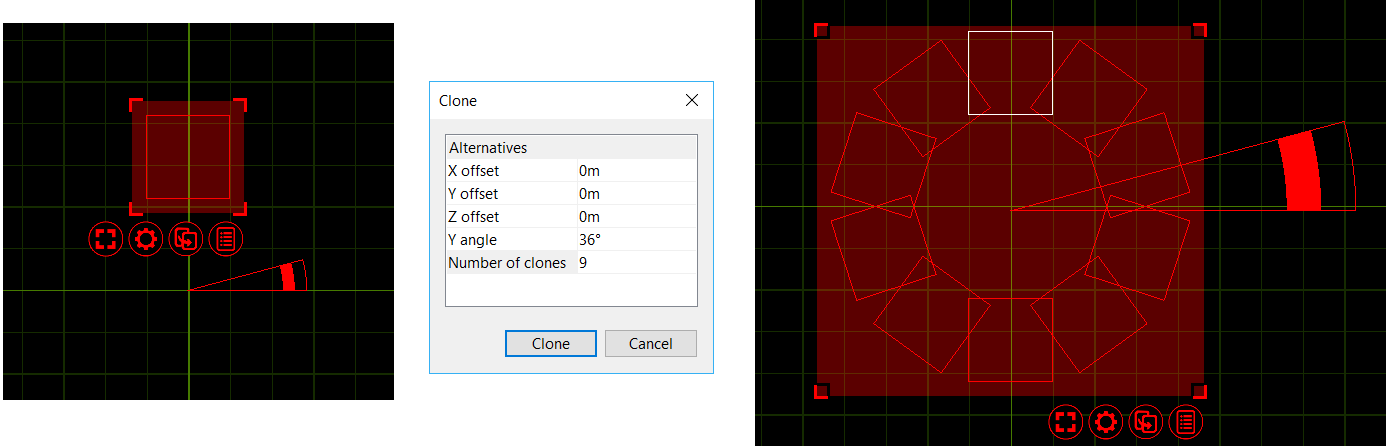 For instance you can create a circle of ten boxes by selecting a box, moving the rotation anchor of the circle, choosing the Clone command, entering an angle of 36 degrees (a full circle of 360 degrees split in ten objects) and 9 copies (since one box already exists, the result will be 10 boxes).
3.2.5 Sequential Unit
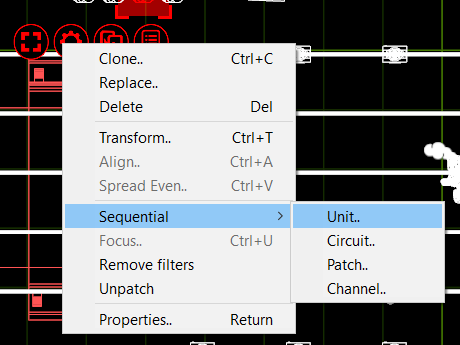
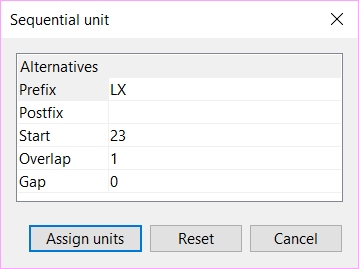
This command allows you to set the Unit property of the selected objects in a consecutive manner. You may specify a Prefix as well as a Postfix to the numbering. The Start property defines the first number of the range. The Overlap property allows you to create series such as 1, 1, 2, 2, 3, 3 and the Gap property allows you to create series such as 1, 3, 5, 7. Notice that if you select objects manually one by one, this defines the order for the numbering. However, if you select them by dragging the mouse over the objects, the order of the objects undefined.
3.2.6 Sequential Circuit
Sequential circuit essentially works just like sequential uniting – except that you assign circuit numbers to the Channel property of fixtures. You may specify a Prefix as well as a Postfix to the numbering.
3.2.7 Sequential Patch
This command allows you to sequentially patch fixtures. The order in which you select the fixtures will be the order they are applied to the patch. You may choose the universe and start address by entering the address as Universe.Address. For example, entering 2.1 would have the fixtures start at channel 1 on universe 2. You also have the option of leaving a gap between fixtures if you wish.
3.2.8 Sequential Channel
Sequential channel essentially works just like sequential uniting – except that you assign fixture numbers to the Channel property of fixtures. Since it is a number and not text, you are not allowed to specify a prefix or postfix.