10 Media Fixtures
10.1 Video Projectors and Digital Lights
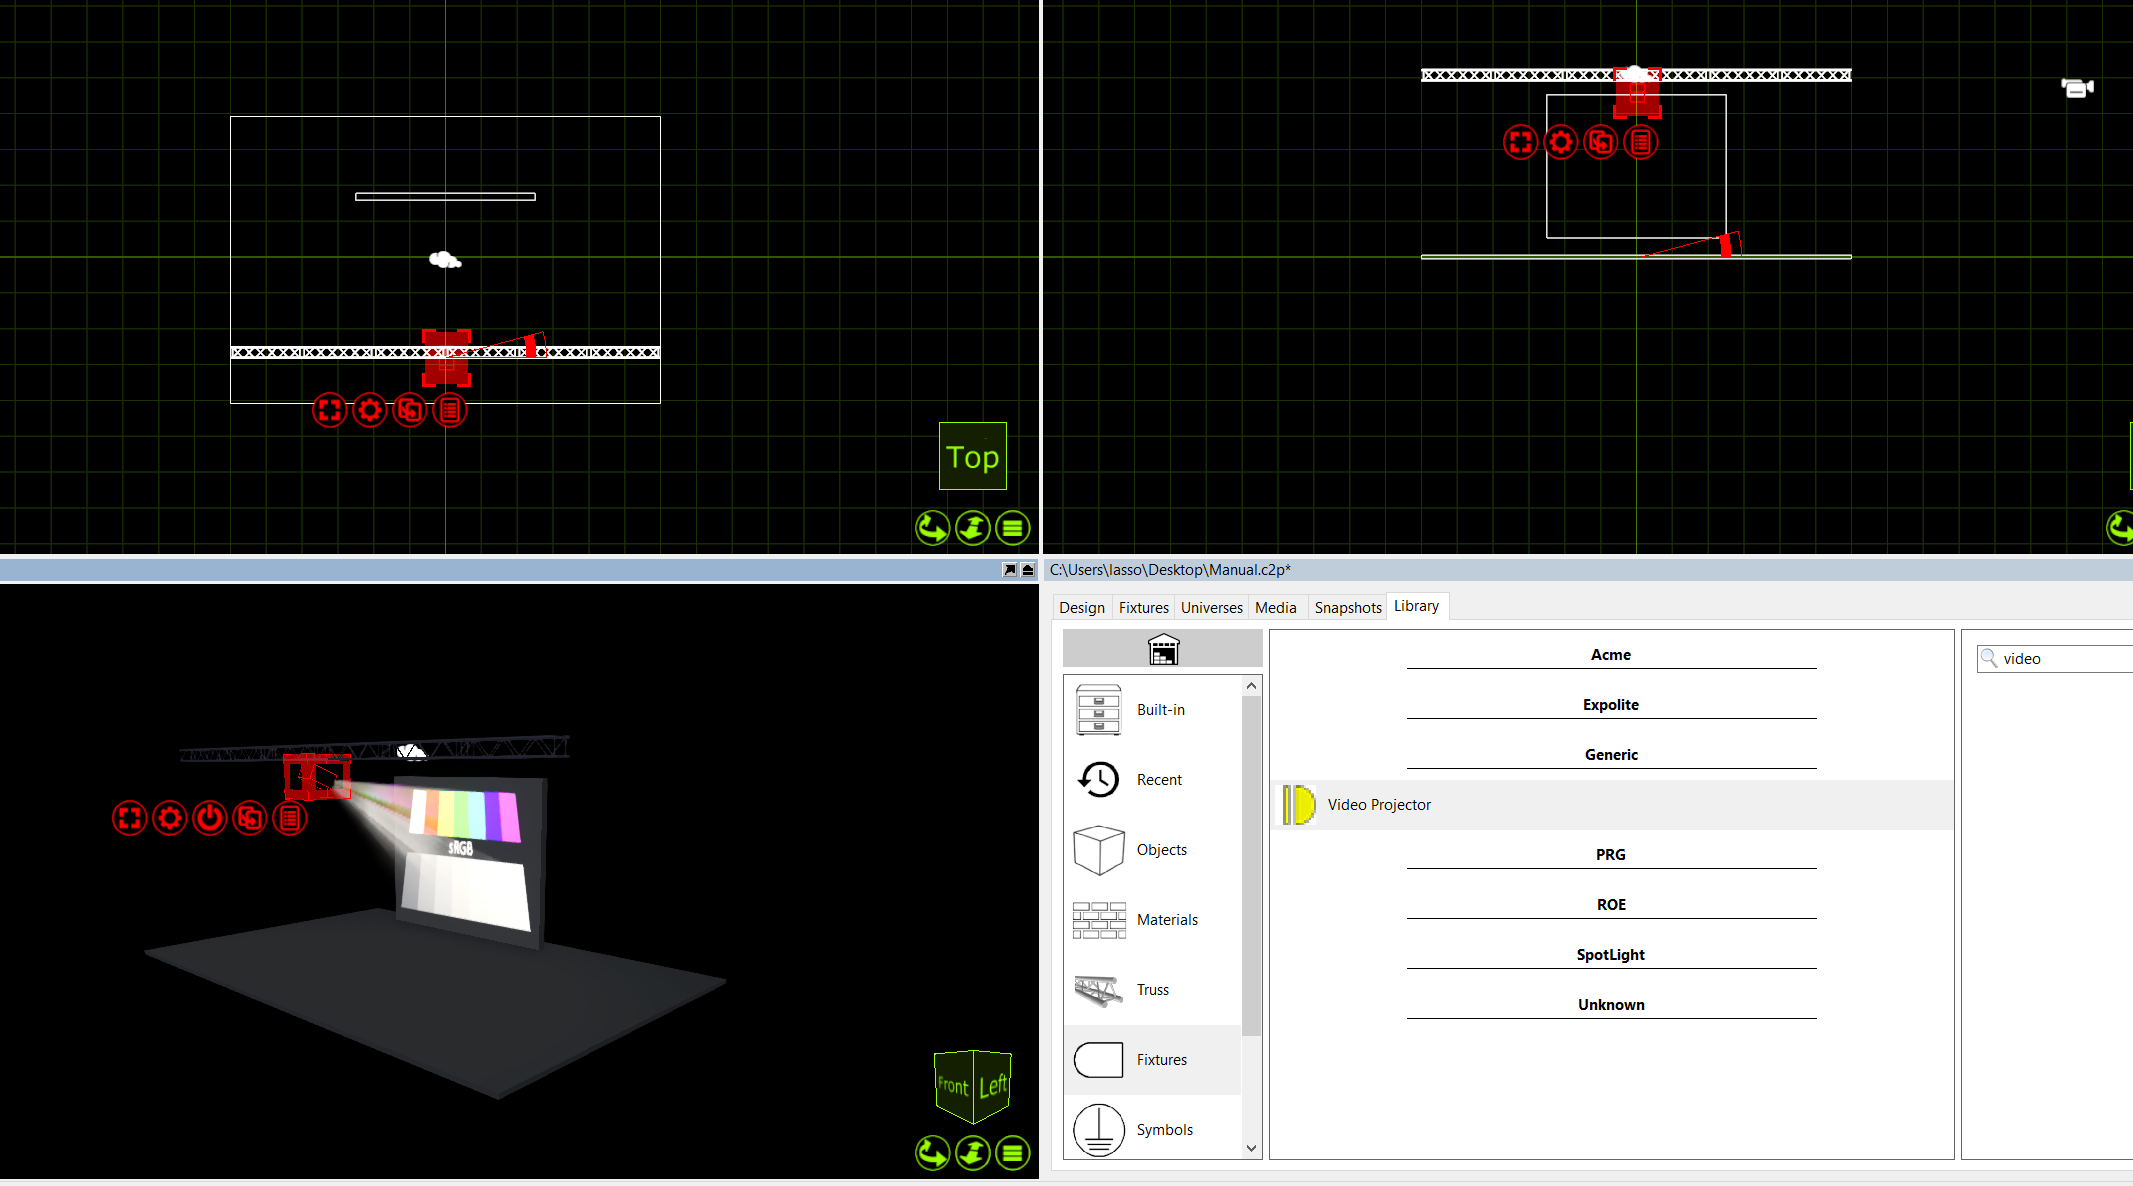
Capture supports a large library of Media Fixtures such as Video Projectors and Digital Lights. Adding a Media Fixture to a Capture Project is the same as anything else - drag it from the library into one of wireframe views.
With Projectors and Digital Lights, they need a video source for any output to be visible. Much like LED Screens, the video source may be an internal video player were by you choose a video file on the computer and play that. Alternatively you may also choose a video source from an external Media Server via CITP for the video source of a Projector.
In this instance we will just use a file on the computer and look at CITP sources in a later chapter.
Add a video projector to the project by dragging it from the library to one of the wireframe design views. You can select a non specific projector from the “Generic” section of Media Fixtures in the library. Add a box, and change its properties so that it looks like a video screen. Position the projector so it is pointing at the screen. A quick way to focus a projector (or any type of fixture) is to right click on the surface you wish to focus it on. In this case, its the screen on stage.
The projector will display a test image when it is turned on but not being assigned an image or media player.
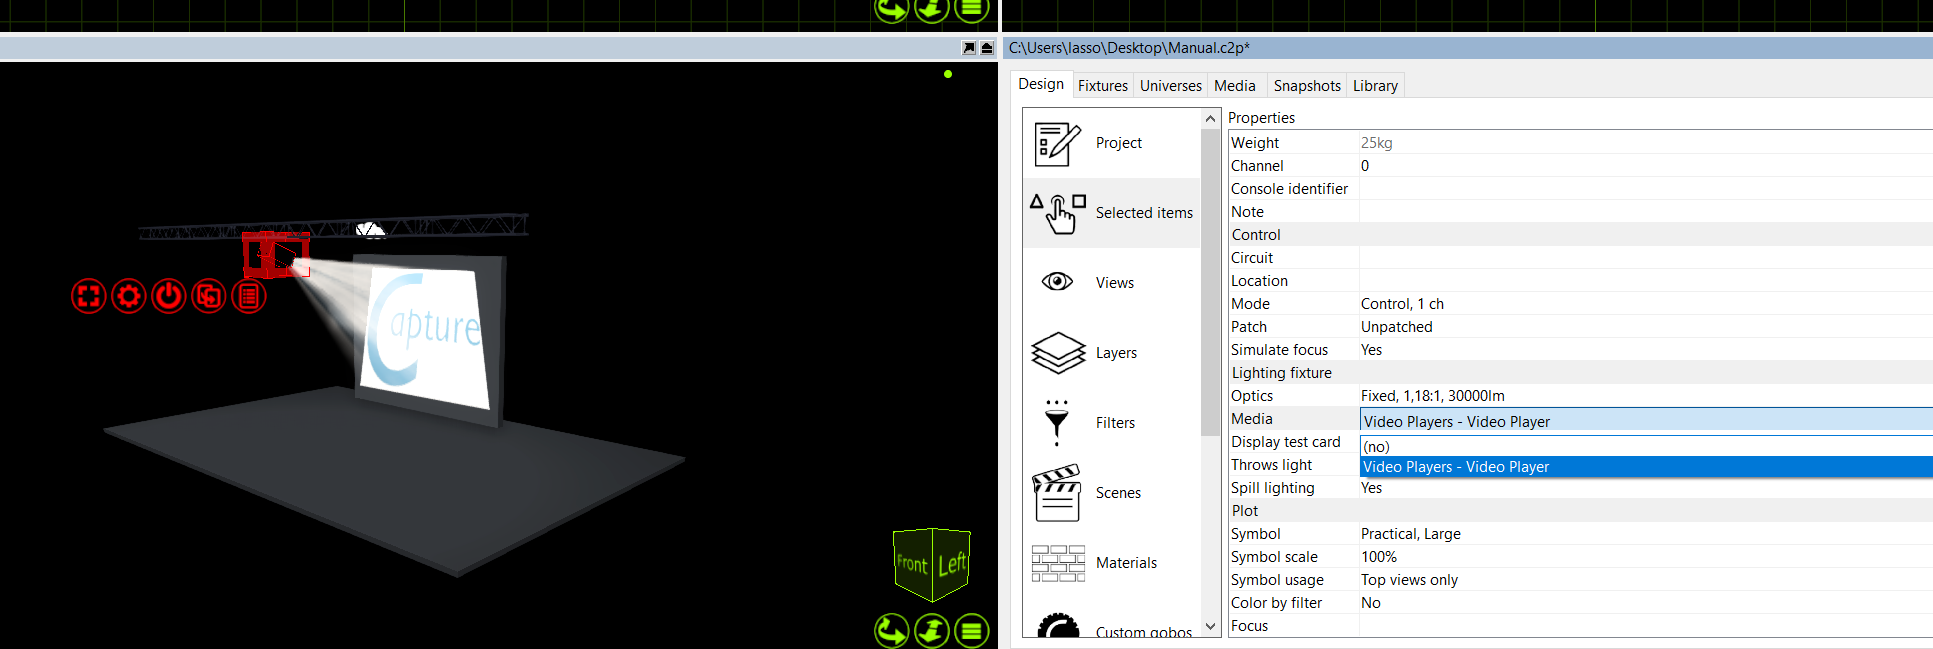
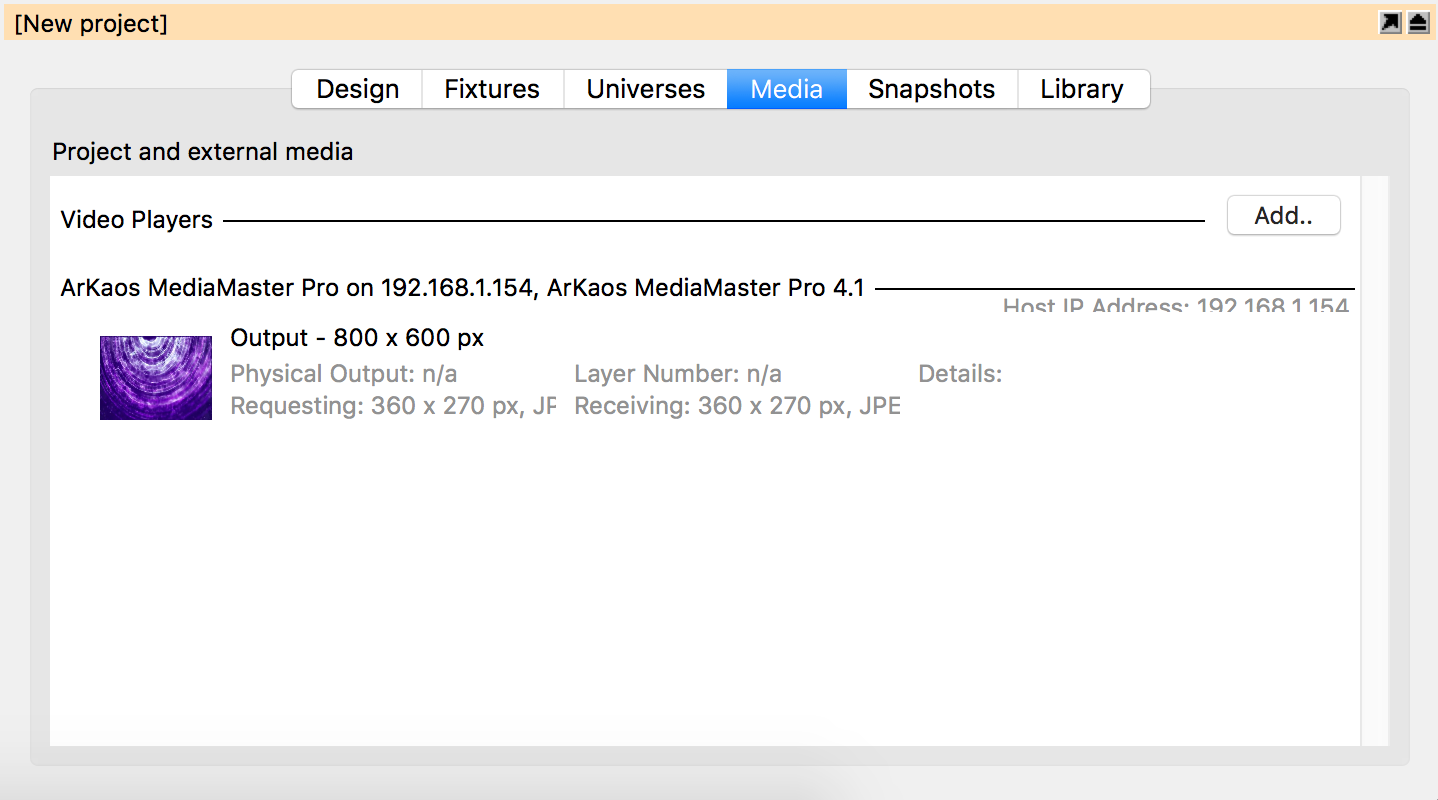
Now, to play video from the projector, you can create a video player within capture. Simply, go to the Media tab in the Project window and press the Add button in the top right corner and name the video player “Projector Video”. Press the Add Video button and choose a video file from the local hard drive. You may select multiple videos as well as image files if you wish. Once you have selected the video you wish to play through the projector, press the play button next to it so the video is playing.
Finally select the video projector and access its properties in the Design tab. Double click on the Media property and choose the video player you had just created.
10.2 Video Players
As discussed in the previous section, you can use an internal Video Player to play videos or images on Video Projectors in Capture. The Video Player can be controlled by DMX if desired. The Patch property of the Video Player can be access by clicking “Settings..” for the desired Video Player in the Media tab.
| Channel 1 | Channel 2 | ||
|---|---|---|---|
| 0-7 | Pause | 0-31 | Playlist entry 1 |
| 8-15 | Play | 32-63 | Playlist entry 2 |
| 16-23 | Replay (Play again from the start) | (similarly) | (playlist entries 3 through 7) |
| 24-31 | Stop | 248-255 | Playlist entry 8 |
10.3 Using CITP Media Sources
Capture supports connecting to Media Servers using the CITP communication protocol. This makes it possible to receive streaming video from a Media Server and apply it to objects like a material. You can view all connected Media Servers in the Video tab in the Project window.
To apply a streaming video to an object, you must first create a material, select the desired video source, set up the dimensions of the material and then apply the material to the objects. Alternatively you may omit setting up the material dimensions and simply map the material using the material mapping functionality discussed earlier.
Little to zero configuration should be required with CITP. Ensure that the Capture machine and the Media Server are operating in the same range of IP addresses and subnet. If the Capture machine has multiple network adapters, it may be necessary to manually select the adapter you will be using for CITP information. This can be done in the Connectivity Tab of the Options menu.
10.4 Controller and Media Server Connectivity
| macOS | Windows | |
|---|---|---|
| Art-Net | Yes | Yes |
| Avolites ACDI | Yes | |
| CITP | Yes | Yes |
| Compulite VC | Yes | Yes |
| EntTec DMX USB Pro Mk1 & Mk2 | Yes | Yes |
| ETC Net 2 | Yes | Yes |
| Green Hippo HMap 3 | Yes | Yes |
| High End Hog 3 & 4 | Yes | Yes |
| Kinesys K2 | Yes | Yes |
| LaserAnimation & Pangolin | Yes | Yes |
| MA Net 21 | Yes | |
| Streaming ACN | Yes | Yes |
1 Requires MA software version 2.9. Requires manual activation; right click in the External universes list of the Universes tab to open the MA-Net configuration dialog.
10.5 NDI Video Sources
Capture supports receiving video from NewTek NDI (http://www.newtek.com/ndi.html) video sources. This makes it possible to receive streaming video from a multitude of both software and hardware solutions. There are also some useful tools for desktop streaming and tests available from the NDI web page of NewTek. Capture lists all NDI sources it finds in the Video tab in the Project Window.
To apply streaming video to an object, follow the same procedure as with CITP Media Sources, described in the previous section.
No configuration is required for NDI, but it is possible to specify one or several NDI groups to limit NDI reception to in the Connectivity Tab of the Options menu. If the Capture machine has multiple network adapters, it may also be necessary to manually select the adapter you wish to use.